This page describes the steps necessary to replace the stock flat black lower trim-piece on the E46 Sport steering wheel with a myrtle wood version to match the myrtle wood trim available as part of the Premium Package. Some gotchas: This part was not available in the US. It helps to find a parts dept. guy with some back-channel contacts into BMW Germany so that you can get parts like this. That's how I obtained my trim-piece.
Cost: $219 (YOW! you better really like wood trim, and be obsessive about this mod to shell out that kind of dough – I'm crazy enough!)
First, the results:

Getting there was not easy, as the part I got from Germany did not fit the same nor was it designed in the same way as the stock trim. However, with some careful Dremel tool skills and cannibalization of part of the original stock trim-piece, a superb fit and appearance can be achieved.
Detailed installation steps
- Remove the driver's airbag/horn unit from the steering wheel and set aside. [Detailed instructions]
-
 With the airbag out, there are
four screws that need to be
loosened/removed to remove the upper and lower trim. All require a #15 Torx
driver. This same tool will be used to unscrew and separate the two halves of
the trim. You will need a skinny, dedicated #15 Torx tool –
torx bits from a general purpose screwdriver kit will not work, as they (and the
tool that they go in) are too large in diameter to fit into the holes behind the
steering wheel, or clear the plastic frame for two of the 4 screws holding the
two trim halves together.
With the airbag out, there are
four screws that need to be
loosened/removed to remove the upper and lower trim. All require a #15 Torx
driver. This same tool will be used to unscrew and separate the two halves of
the trim. You will need a skinny, dedicated #15 Torx tool –
torx bits from a general purpose screwdriver kit will not work, as they (and the
tool that they go in) are too large in diameter to fit into the holes behind the
steering wheel, or clear the plastic frame for two of the 4 screws holding the
two trim halves together.-
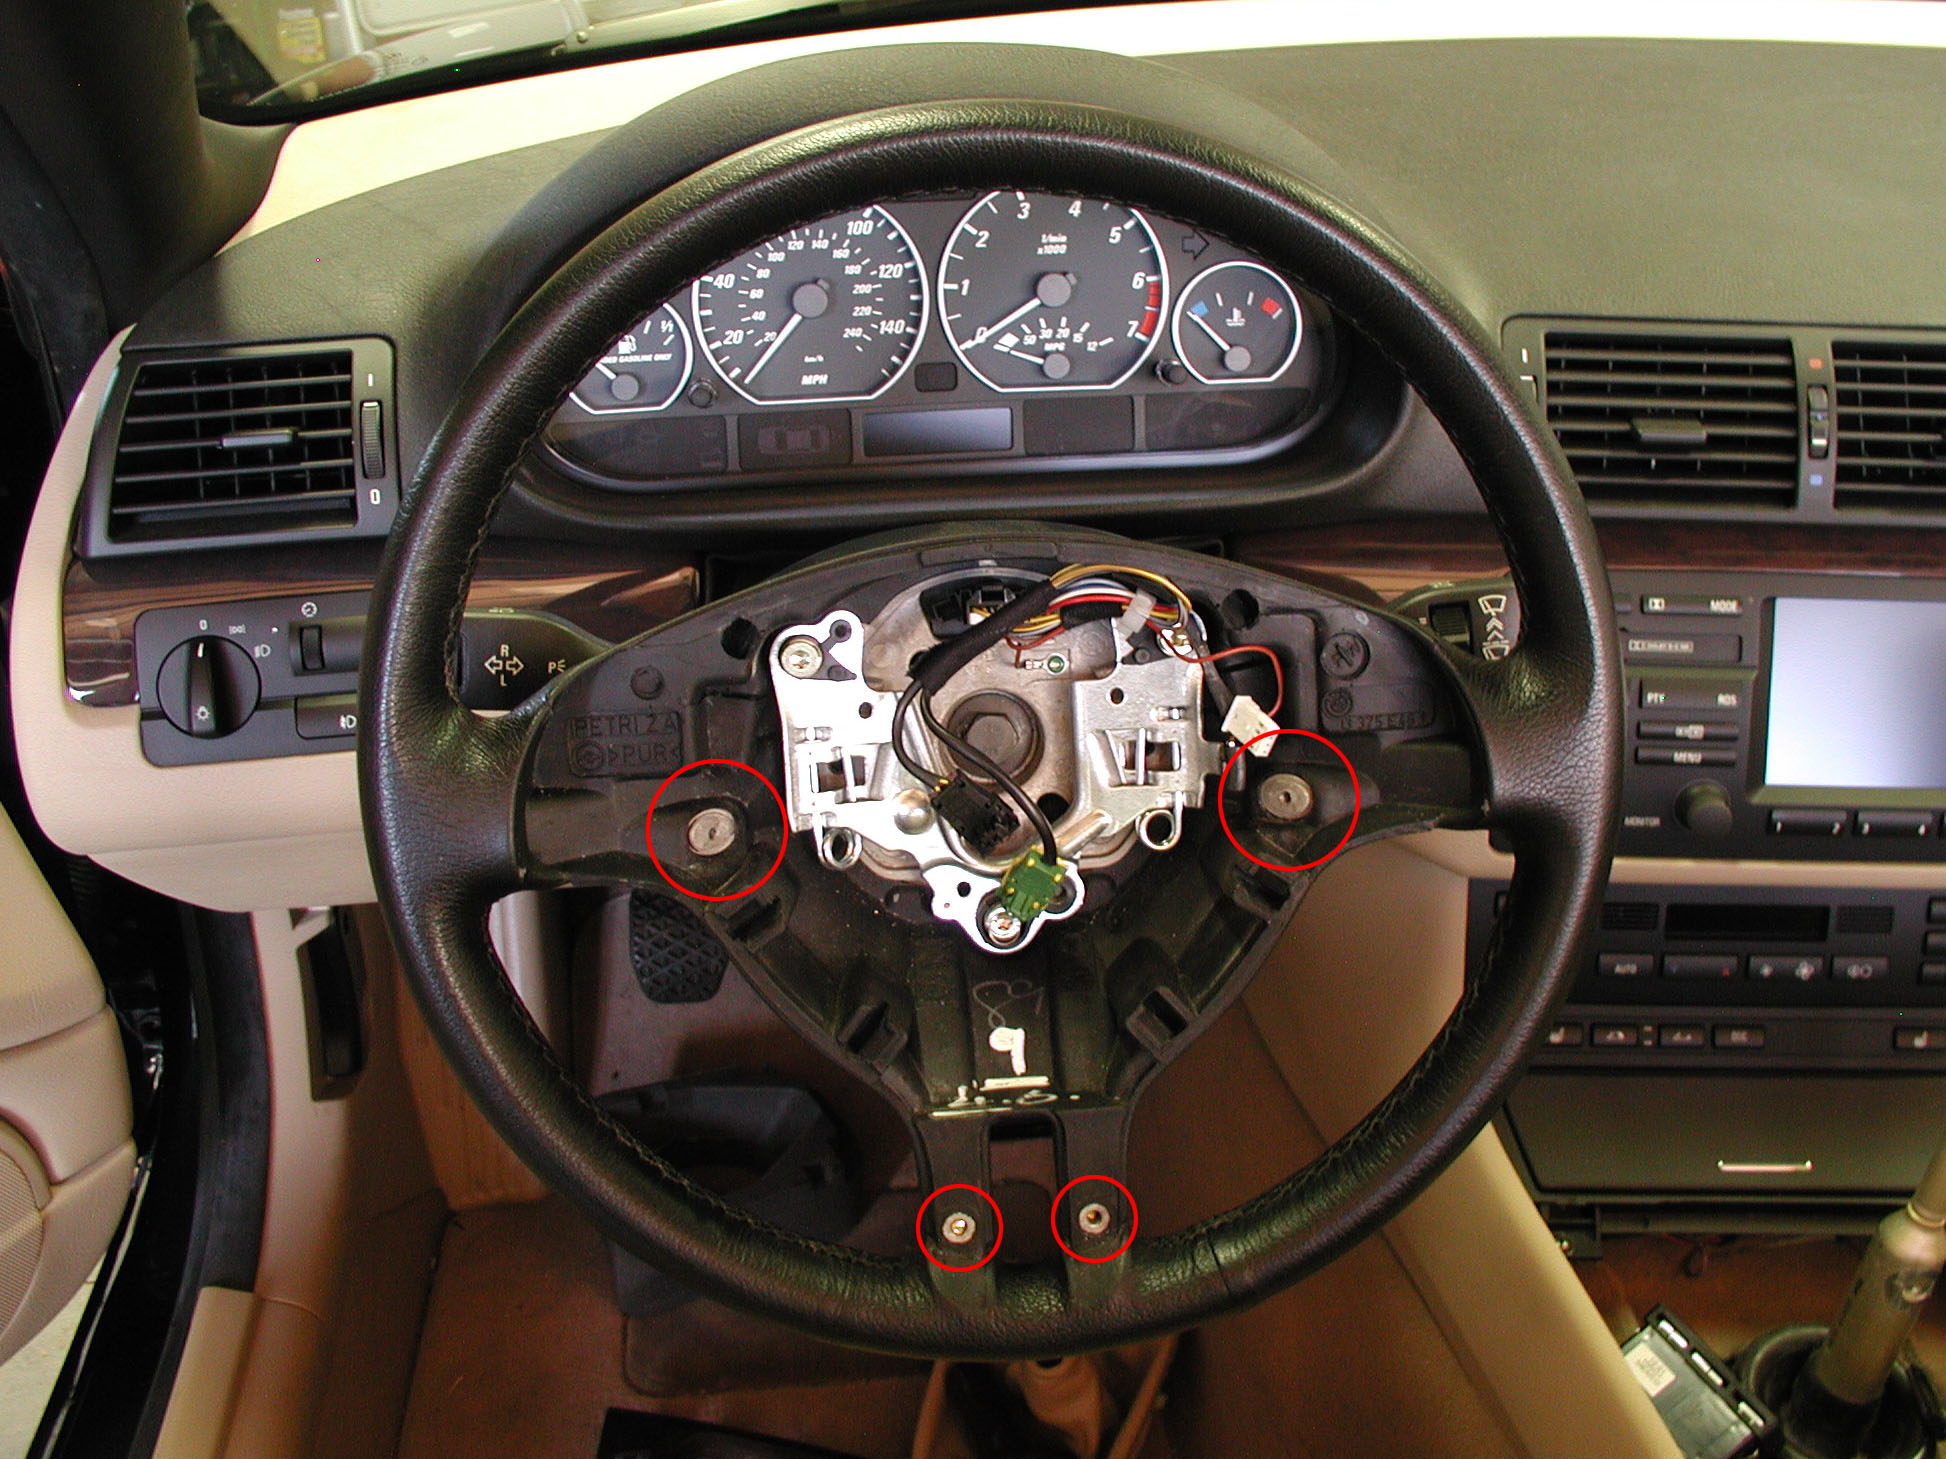
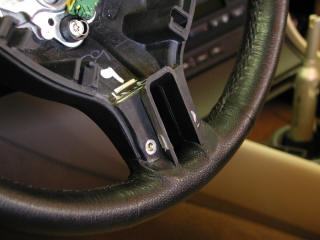
Remove the two front torx screws as indicated in the picture (top two red circles, shown with trim removed for better visibility). Loosen completely the two screws on the bottom spokes of the steering wheel via the holes in the back of the spokes. These are captured screws, so they don't come out. I find it helpful to apply some inward pressure when I think I've completely unscrewed these fasteners while turning the tool a few more turns and feeling for the "click" of the threads reseating – this way I know I've loosened it completely, but don't risk getting the screw threaded in it's capture.
-
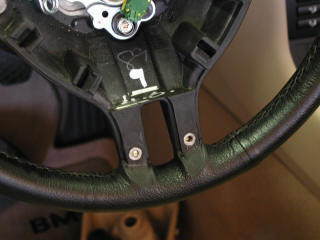
 Remove
the combined upper/lower trim by pulling out from the bottom spokes first, and
pulling out and down on the whole unit. Be gentle with this – there are two tabs
on the upper piece that mate with holes in the rubber back of the steering
wheel. These are primarily what you are loosing up and working out.
Remove
the combined upper/lower trim by pulling out from the bottom spokes first, and
pulling out and down on the whole unit. Be gentle with this – there are two tabs
on the upper piece that mate with holes in the rubber back of the steering
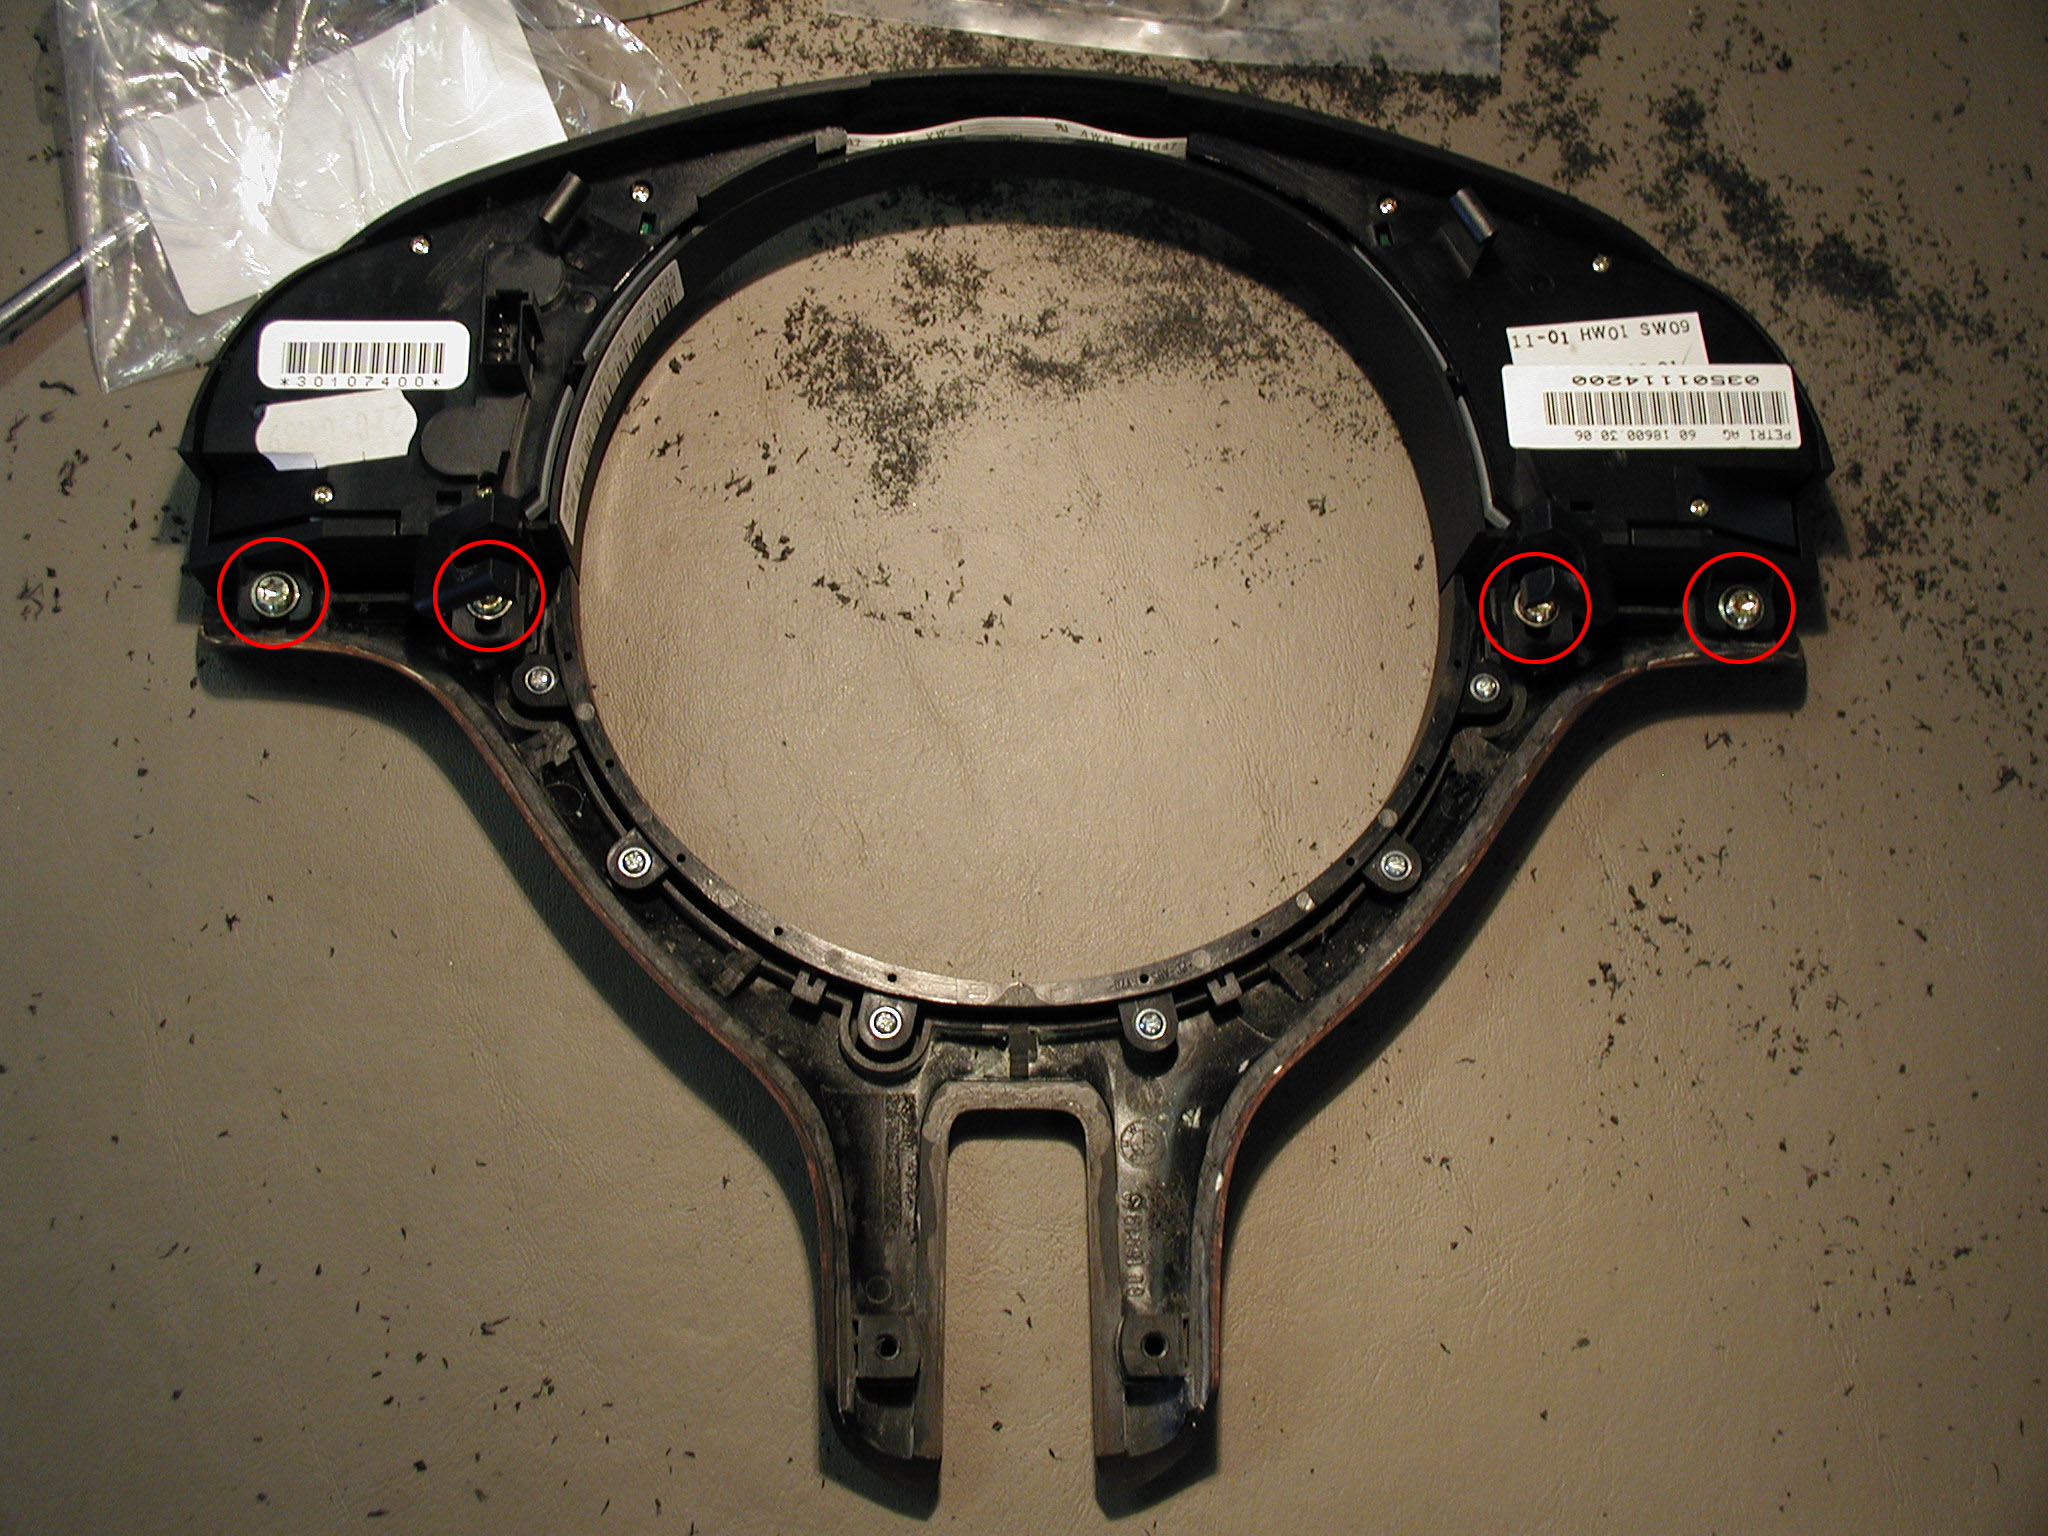
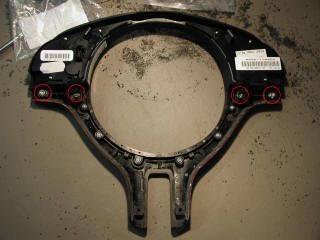
wheel. These are primarily what you are loosing up and working out. - Disconnect the the wiring connector from the upper trim half. You can now remove the combined trim-piece and take it to your workbench. Although the picture on the right is of the new assembly, the original assembly looks the same.
- Remove the 4 screws indicated in the picture to separate the two halves. Set the upper half (with the controls) aside. You will need to cannibalize the lower half, destroying it, later on in the instructions so keep it handy.
-
-
Let's first take care of the shaping work on the new trim-piece to get it to fit right. Whatever steering wheel this was designed for, it was quite a bit different than the MY2001 330cic. There are three primary modifications that need to be made to get a good fit. I used a Dremel tool with the multi-purpose cutting bit (#561) to do all of the cutting and shaping described.
-
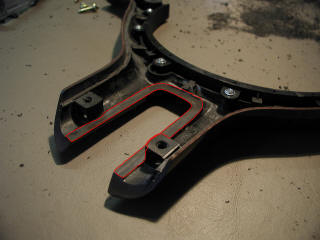
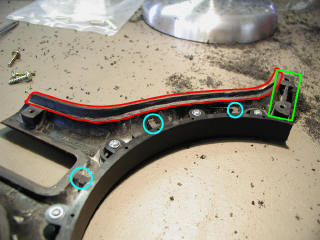 The
plastic material just inside the wood laminate needs to be trimmed down to
create a channel for a small lip on the steering wheel that seats in this
location. Study the picture at the right to see the final shape. This needs to
be repeated on both sides of the trim. The area machined is outlined in red.
Be very careful while removing this material not to bite in to the wood laminate
on the outside of the part!
The
plastic material just inside the wood laminate needs to be trimmed down to
create a channel for a small lip on the steering wheel that seats in this
location. Study the picture at the right to see the final shape. This needs to
be repeated on both sides of the trim. The area machined is outlined in red.
Be very careful while removing this material not to bite in to the wood laminate
on the outside of the part! - The screw locations for joining the two trim halves need to be shaved down (green rectangular highlight) so that the top and bottom join flush. The OEM part was too thick, so that nearly a whole millimeter "lip" was created where the upper and lower halves joined on the front side. This was not only annoying to feel, but it screwed up the fit of the lower piece relative to where it meets the steering wheel on the left and right sides. You will have to shave this down a little bit, test join the pieces, and repeat until you get a satisfactory fit. Repeat for both sides. Then, screw the pieces together and test fit in the steering wheel, and make further adjustments as necessary.
- There are 5 large tabs on the new piece that aren't present on the original black part. There are also mating holes/slots on the steering wheel for them, just to make you think this is a good thing. Well, even though they'll go in there, the final fit isn't good – they're too long – so chop 'em off. Three are pictured here, already cut off, circled in blue.
-
- Repeat all this on both sides (left and right).
-
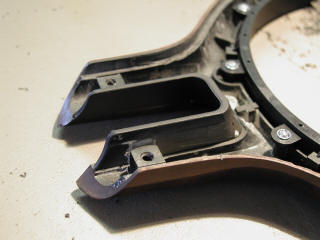
 Okay,
the easy part's over! Now for the fun stuff. In the previous photo, you might
have noticed that down in between the two bottom spokes the inside edge is not
flush with the outer edge that was just machined. Indeed, about 15-20mm (½")of
it seems to be missing. If you examine the original black part, this area is
formed to the same height as the outside, flush with it. If you
just put this on your steering wheel as is, you have a very obnoxious U-shaped
gap inside the two bottom spokes about a ½" deep – big enough to get your thumb
and/or fingers into, with rather sharp edges, and very uncomfortable to drive
with. Not to mention it doesn't look very good. That was my first low-effort
attempt installing this, and it was bad enough to motivate me to take the plunge
and correct the problem as described below. The picture at the right gives
another view from a different angle. Area under discussion outlined in red.
Okay,
the easy part's over! Now for the fun stuff. In the previous photo, you might
have noticed that down in between the two bottom spokes the inside edge is not
flush with the outer edge that was just machined. Indeed, about 15-20mm (½")of
it seems to be missing. If you examine the original black part, this area is
formed to the same height as the outside, flush with it. If you
just put this on your steering wheel as is, you have a very obnoxious U-shaped
gap inside the two bottom spokes about a ½" deep – big enough to get your thumb
and/or fingers into, with rather sharp edges, and very uncomfortable to drive
with. Not to mention it doesn't look very good. That was my first low-effort
attempt installing this, and it was bad enough to motivate me to take the plunge
and correct the problem as described below. The picture at the right gives
another view from a different angle. Area under discussion outlined in red.
-
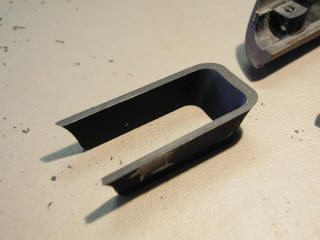 To
fix this, we are going to cut that section out of the original trim piece, destroying
it in the process. The photo at right shows what the finished piece looks like
when we're done. In this photo, the top surface of the piece is where it was
originally joined with the old trim (actually, the entire thing is one solid
injection-molded piece of plastic). The bottom edge is where it mates with the
steering wheel. Looking at the picture right above in step 5, this crafted piece
would be flipped over and placed where the red outline is. Here's how you make
it:
To
fix this, we are going to cut that section out of the original trim piece, destroying
it in the process. The photo at right shows what the finished piece looks like
when we're done. In this photo, the top surface of the piece is where it was
originally joined with the old trim (actually, the entire thing is one solid
injection-molded piece of plastic). The bottom edge is where it mates with the
steering wheel. Looking at the picture right above in step 5, this crafted piece
would be flipped over and placed where the red outline is. Here's how you make
it:-
Using dremel, cut this portion out of the original trim. It's a good idea to do some measuring first on the new trim to determine how much height you'll need from the old part, then score a line around the old part with 2mm or so extra. This will be sanded off anyway. The multi-purpose bit (#561) is a good choice here as it cuts the plastic without melting it. Do not use dremel cut-off wheels – they build up too much heat and will melt the material!
- Test-fit your raw cut piece in the new trim to get an idea how much more you need to take off. If more than 1-2mm, use your cutting bit very carefully to shave off some more. Once you've got it down to a few millimeters, break out the sandpaper for the next step.
-
 Working
on a hard surface (my Workmate™ was perfect for this) secure a piece of
medium to fine sandpaper to the surface. Place the work-piece with the side that
mates to the new trim down on the sandpaper. Apply even pressure across the
entire piece, and sand with varying circular and linear motion. Frequently check the fit in
the new trim piece by placing it in the trim, as well as uniformity of dimensions around the entire
U-shape frequently. For instance, the width on both legs of the U should be the
same. A set of calipers really helps here. Keep working the sanding process until
you get a fit where the piece is flush with the outside edges of the new trim.
This can be checked with anything flat and stiff laid across the top of the
pieces when placed as shown to the right. The picture here shows what it looks
like when it is finished.
Working
on a hard surface (my Workmate™ was perfect for this) secure a piece of
medium to fine sandpaper to the surface. Place the work-piece with the side that
mates to the new trim down on the sandpaper. Apply even pressure across the
entire piece, and sand with varying circular and linear motion. Frequently check the fit in
the new trim piece by placing it in the trim, as well as uniformity of dimensions around the entire
U-shape frequently. For instance, the width on both legs of the U should be the
same. A set of calipers really helps here. Keep working the sanding process until
you get a fit where the piece is flush with the outside edges of the new trim.
This can be checked with anything flat and stiff laid across the top of the
pieces when placed as shown to the right. The picture here shows what it looks
like when it is finished. - Not quite done yet. The original trim is actually made out of a
white plastic that has been painted flat black. The sanded edge is now white,
and will look bad even if just a hair's width gets exposed when putting it all
together. Buy a can of flat black spray paint, carefully mask off the inside
portion of the U with masking tape leaving the sanded edge exposed, and paint
the edge. A fast-drying enamel will work fine.
Now, I considered gluing this piece to the new trim, but it turns out it isn't necessary to hold it firmly in place when the steering wheel is reassembled. Leaving it floating offers the advantage of being able to make tiny adjustments to the positioning of the piece relative to the new trim, so that all joints between the two pieces can be adjusted to eliminate and discontinuities resulting in feeling an edge. If you glue it, and don't get it perfect, you'll be stuck. Once everything's screwed down tight in the free-floating configuration doesn't budge.
-
-
Now your ready to put it all together. Following some careful steps in assembling and screwing the top and bottom halves together is important to get a nice, clean fit and finish. Here's how:
-
Screw
in the two outer screws first. Slide the two pieces together, then lightly
tighten the screws so that the pieces stay together.
- Screw in the two inner screws. Tighten all the way.
- On one side, back off both screws ¼ turn. You should be able to move the top and bottom halves relative to each other a little bit on that side. Adjust them relative to each other until the interior fit where the airbag goes is nice and flush, and the outer edge where the two parts meet the steering wheel is also flush. Adjust until you are satisfied that you have gotten the best fit possible. Then, holding this in place, squeeze the two halves together tightly on the working side to reduce the gap where they join as much as possible. When you are satisfied, tighten the outer screw pretty tight, and then the inner screw, maintaining the squeezing pressure the whole time.
- Repeat for the other side. Note that, after
lining up one side, the other probably won't line up. Just flex the new piece to
adjust as discussed in c), and tighten everything up.
-
- Next, place the U-shaped part that you created in the steering wheel where it belongs. Two pictures at right – one before placement, one after.
- Reconnect the electrical connector for the upper trim radio/cruise controls.
- Now reinstall the joined trim pieces following the reverse steps for removal. Screw down the bottom spokes first. Loosen just enough to move the U-shaped piece around a little bit to adjust it, but maintain a friction fit so that your adjustments stay in place. You can stick a screwdriver down into the spoke from the inside to push the legs in toward the opening, and just use your fingers to push them the other way toward the screws. Work on this until you have the best fit possible, with a minimum amount of edge dislocation between the U piece and the new trim. I got mine just about perfectly flush and smooth all the way around the U.
- When tightening the two upper screws, using the palm of you hand apply pressure to the assembly to get the outer joint with the wheel as flush as possible before tightening. Repeat on the other side. All the parts flex to some degree, so this procedure will work fine. Pefection was not possible, however, but even the stock trim from the factory wasn't perfect in this regard.
- Replace the airbag, reversing the steps for removal. Reconnect battery.