-
Removal of the airbag is required to access the trim components. Airbags are explosive, and are therefore extremely dangerous. They should be handled with extreme care, and never removed or disconnected with live power to the vehicle. You mess with the airbag at your own risk – if unsure or in doubt, have a competent professional perform the installation.
-
 The
battery must be disconnected first at the negative (ground) terminal; you must
then wait 5 minutes to ensure that any stray charge that may be built up in
component capacitors, etc. can dissipate. Access to the battery is in the
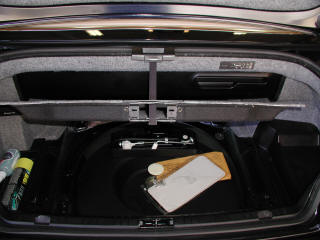
trunk, at the right rear of the car under the black battery cover. First, lift
the trunk bottom liner and secure with the handle as shown.
The
battery must be disconnected first at the negative (ground) terminal; you must
then wait 5 minutes to ensure that any stray charge that may be built up in
component capacitors, etc. can dissipate. Access to the battery is in the
trunk, at the right rear of the car under the black battery cover. First, lift
the trunk bottom liner and secure with the handle as shown.
-
 Next,
remove the two plastic battery cover screws by turning 1/4 turn. The battery
cover can then be removed by lifting and wiggling to work the tabs loose that
are securing it to the side carpet trim in the trunk. Remove the battery cover
completely and set aside.
Next,
remove the two plastic battery cover screws by turning 1/4 turn. The battery
cover can then be removed by lifting and wiggling to work the tabs loose that
are securing it to the side carpet trim in the trunk. Remove the battery cover
completely and set aside.
-
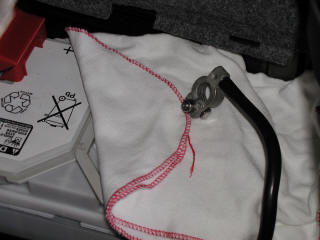
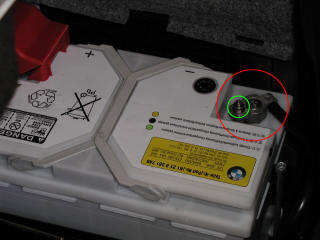 Disconnect
the cable at the negative battery terminal as shown. Loosen the compression
nut (green circle, 10mm wrench/socket) and pull the connector off the
terminal. Then, secure the battery in some way as to ensure that the cable
doesn't inadvertently contact the battery terminal while you are working on
the car – this is vitally important! I simply cover the terminal with a towel
as shown in the second photo.
Disconnect
the cable at the negative battery terminal as shown. Loosen the compression
nut (green circle, 10mm wrench/socket) and pull the connector off the
terminal. Then, secure the battery in some way as to ensure that the cable
doesn't inadvertently contact the battery terminal while you are working on
the car – this is vitally important! I simply cover the terminal with a towel
as shown in the second photo.
-
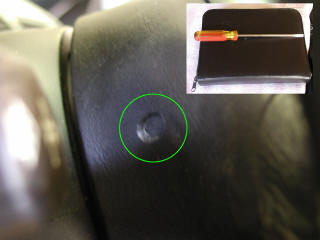 After
waiting at least 5 minutes, we are ready to remove the air bag. This requires
a long, fairly skinny flat-blade screwdriver. The one I use is shown in the
inset picture at the right resting on top of the zippered owner's manual pouch
that comes with the car, to give you an idea of the size.
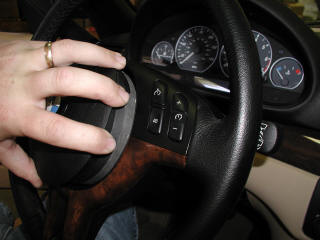
After
waiting at least 5 minutes, we are ready to remove the air bag. This requires
a long, fairly skinny flat-blade screwdriver. The one I use is shown in the
inset picture at the right resting on top of the zippered owner's manual pouch
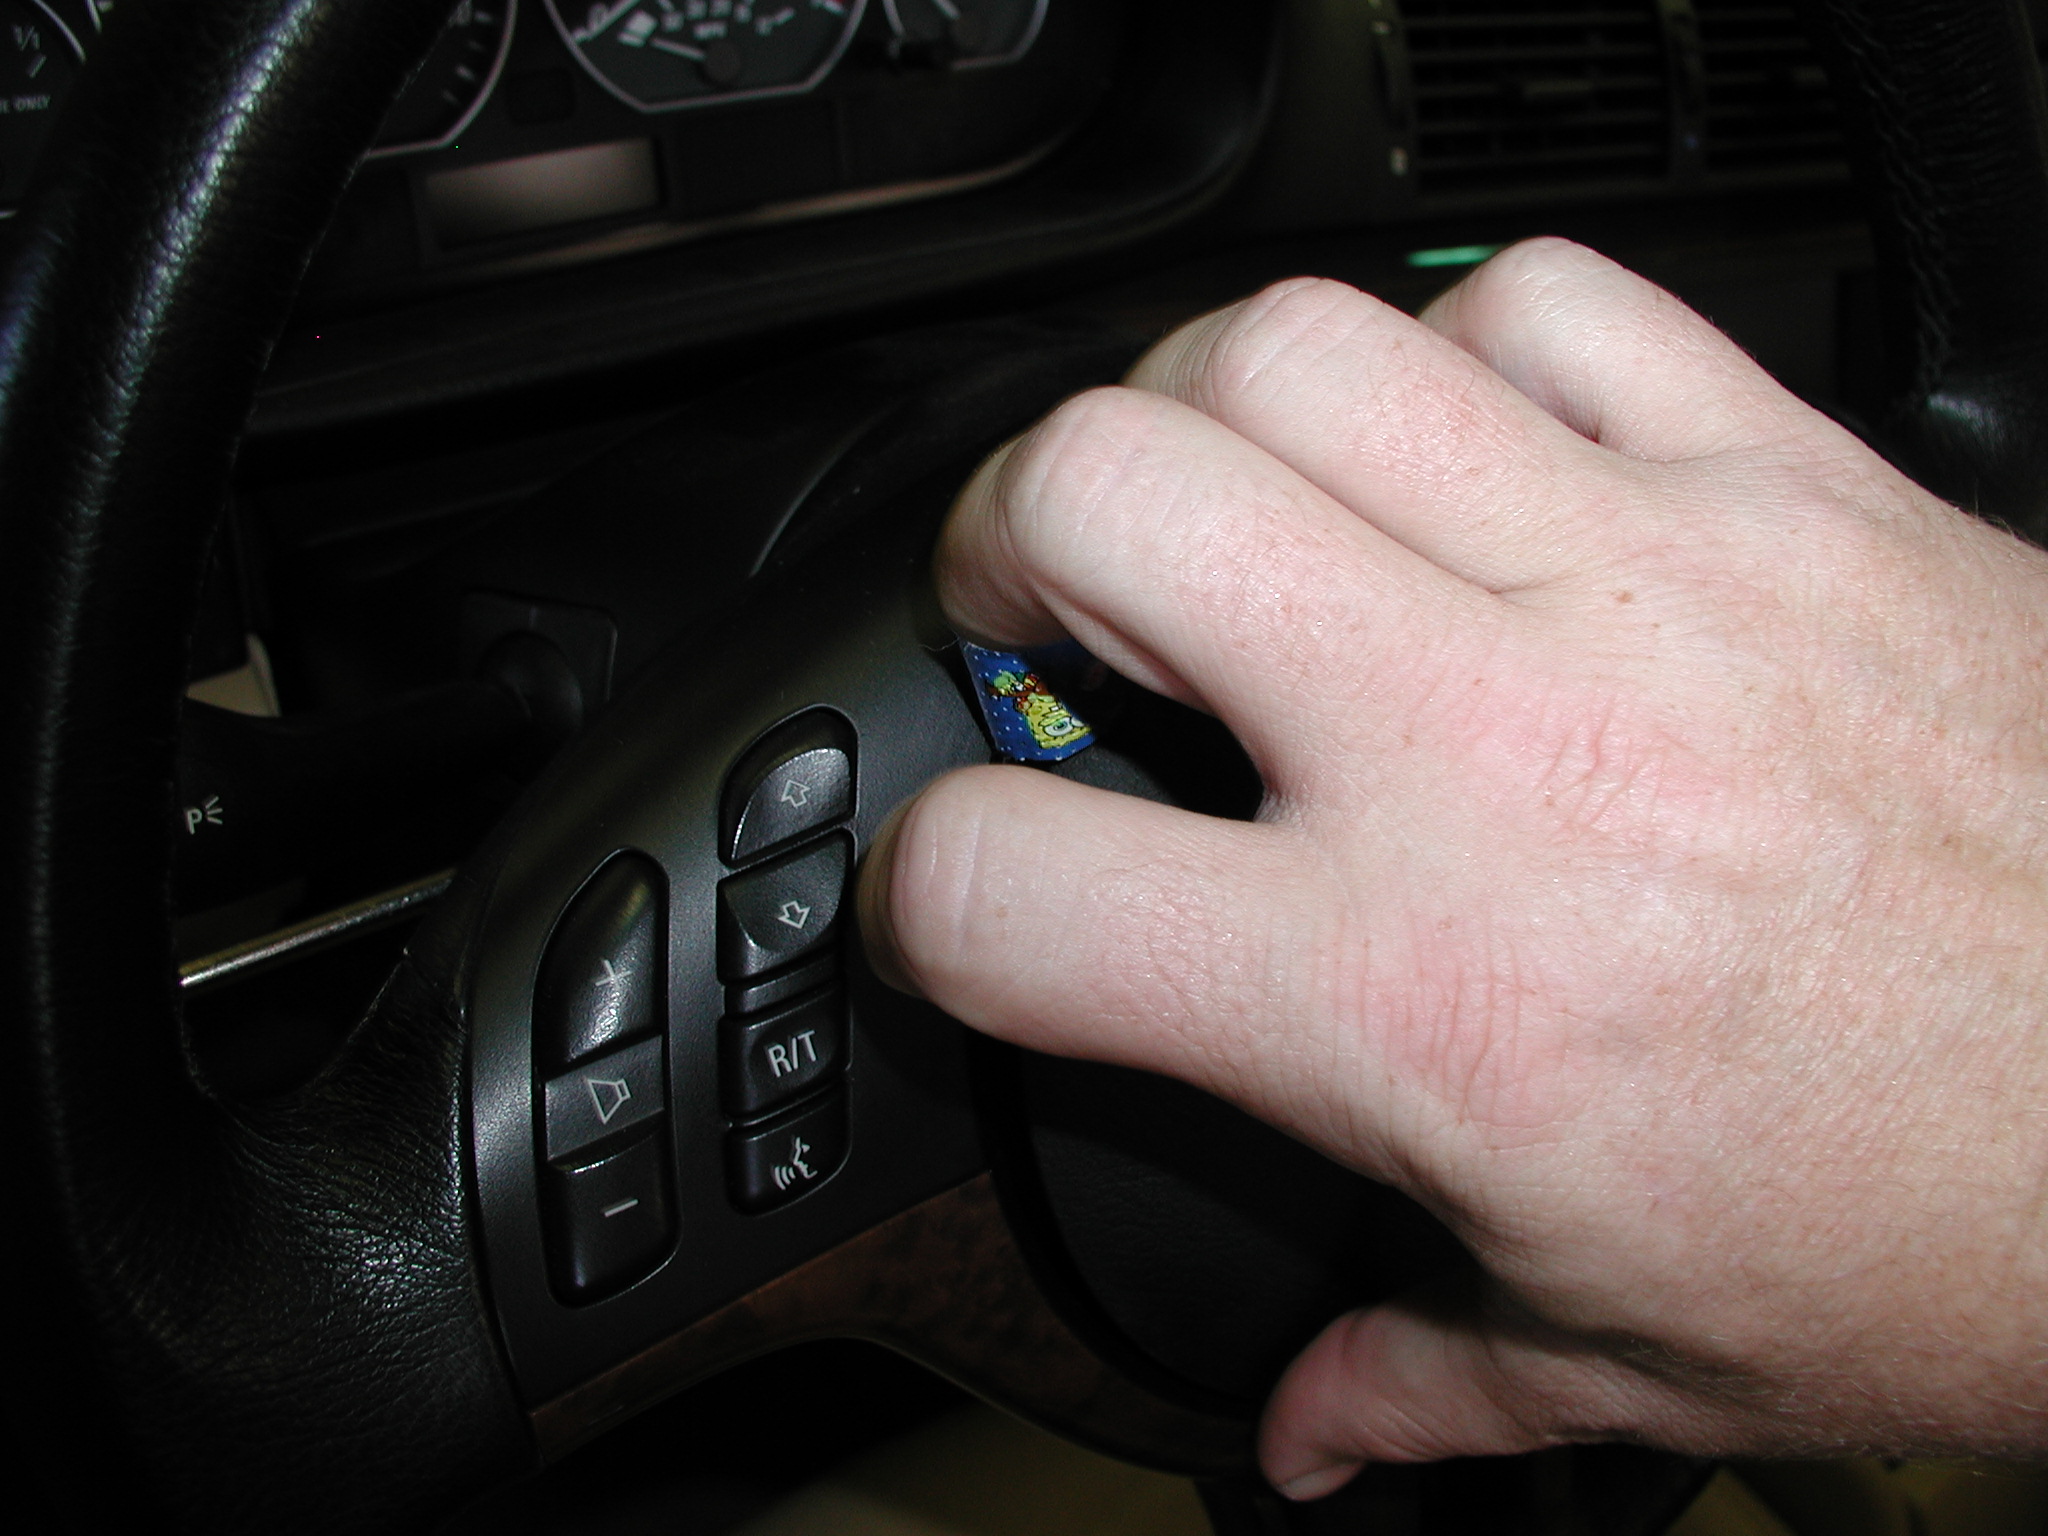
that comes with the car, to give you an idea of the size.On the side of the steering wheel at approximately the 10 and 2 o'clock positions are small oval indentations with a slit (green circle) providing access to the interior of the steering wheel, shown in the picture at right. It is through these access points, using the screwdriver, that you will press the latching spring for each of the two airbag catches, and release the unit.
-
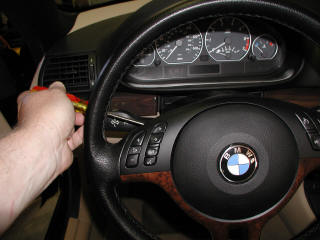
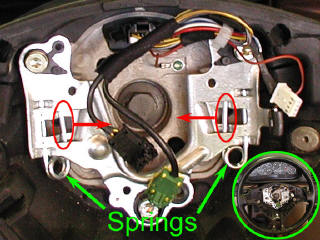
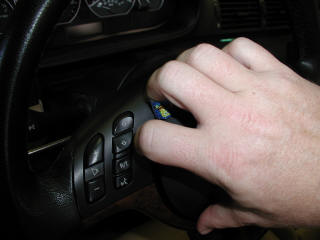
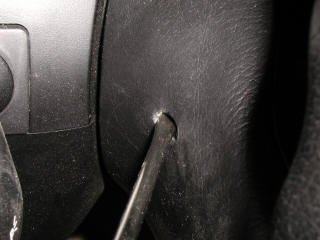 Insert
the screwdriver as shown. The vertical angle of the screwdriver in the second
picture is about right to hit the spring correctly. The third picture shows
what you're going for; the red ovals show the catches that latch the airbag,
and the arrow shows the direction of compression to release. You will have to
feel around a bit to get it; be gentle, and don't push around too hard until
you are sure you have the spring. Once you're on it, compress it as far as you
can and hold, while you execute the next step.
Insert
the screwdriver as shown. The vertical angle of the screwdriver in the second
picture is about right to hit the spring correctly. The third picture shows
what you're going for; the red ovals show the catches that latch the airbag,
and the arrow shows the direction of compression to release. You will have to
feel around a bit to get it; be gentle, and don't push around too hard until
you are sure you have the spring. Once you're on it, compress it as far as you
can and hold, while you execute the next step.
-
 While
holding the spring compressed, grab the edge of the airbag/horn unit with your
fingertips and pry it out a little bit to get the catch past the spring latch.
It will only come out 2-3mm – that's all you need.
While
holding the spring compressed, grab the edge of the airbag/horn unit with your
fingertips and pry it out a little bit to get the catch past the spring latch.
It will only come out 2-3mm – that's all you need.
-
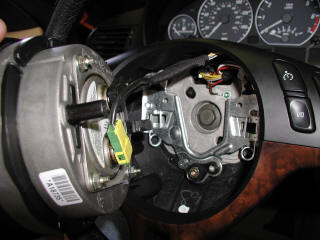
 Repeat
for the other side. This time, however, the airbag/horn unit should work
itself out quite a ways as you grasp it with you fingertips. Assuming the left
side hasn't re-latched, you should be able to carefully work the unit out of
the center of the steering wheel assembly. As you do this, be mindful that
there are two cables attached to the unit with locking connectors, so be
careful and gentle.
Repeat
for the other side. This time, however, the airbag/horn unit should work
itself out quite a ways as you grasp it with you fingertips. Assuming the left
side hasn't re-latched, you should be able to carefully work the unit out of
the center of the steering wheel assembly. As you do this, be mindful that
there are two cables attached to the unit with locking connectors, so be
careful and gentle.
-
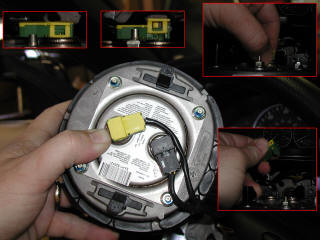 Now disconnect the airbag. There are two connectors, one
yellow/green, the
other black. Each disconnects in the same way. The picture has four small
insets showing the steps for releasing the connectors and pulling them off – click on the image to get a larger view if necessary.
Carefully and gently pull up on the plastic lock as shown. Then simply pull
the connector out of its mating receptacle. Carefully set the airbag unit
aside.
Now disconnect the airbag. There are two connectors, one
yellow/green, the
other black. Each disconnects in the same way. The picture has four small
insets showing the steps for releasing the connectors and pulling them off – click on the image to get a larger view if necessary.
Carefully and gently pull up on the plastic lock as shown. Then simply pull
the connector out of its mating receptacle. Carefully set the airbag unit
aside.